"The Cotton London Highly Appreciates Roo Williams Work, How He Is Designing Diy Mask Face For As Many People As Possible. The Cotton London Is Also Working On All This Procedure For The People And Contribute Its Part To Save Other Lives”
INTRODUCTION
Its 2020, a global pandemic of COVID-19 is under way. This virus can spread through airborne droplets expelled by anyone infected. Governments around the world have recommended wearing face masks in an attempt to catch airborne viruses before they reach a person’s airways.
Problems
Increased Chances of Infection
If handled incorrectly, face masks can actually increase a wearer's chances of infection. As one is worn, particles are drawn from the air by the breath towards the mouth getting caught by the mask. By handling the mask, say by dropping it down to eat and then sliding it back up all those particles come into contact with fingers or get smeared on the face.
A recommendation is to treat a mask like a worn piece of underwear once removed. Wash it right away or if it's disposable, discard. This creates a problem where if only one mask is owned then it’s unavailable until washed.
Discomfort
If we are in this for the long haul then prolonged wearing of masks may become a daily reality.
Medical professionals and regular people alike don't even need to complain that the current masks on the market and DIY creations exert a lot of pressure on the ears, bridge of nose and face - the pictures speak for themselves. For the public, without the intensity immediate threat seen in hospitals, an uncomfortable mask will soon become an unworn mask.

Performance
A common issue with masks is that they can leak with areas such as the bridge of the nose to the cheek and under the chin often cited as places of entry of particles during tests.
Shortage
and then we have a global mask shortage.
The Solution

EVERY MASK is a DIY, no sew mask that uses a custom harness to tightly fit a sheet of filter material to a person's face. It's built with the idea that SOMETHING is better than nothing. It uses an adjustable head strap to avoid ear fatigue and a custom-formed nose piece spreads tension across more of the nose and cheeks vs. creating sores on the bridge. By using an elastic loop around the face and pulling it in using the head strap a better seal is created.
After use the filter material can be easily disposed of or washed without the wearer having to touch the potentially contaminated filter material, and because the wearer only replaces the filter portion they don't have to reset the comfort of the harness.
By focusing on the harness I hope that a community of EVERY MASK users can improvise on the filter's material and pattern and prevent more infections. Resources are limited at the moment, so this mask has been designed with NASA's ISRU principles in mind meaning that it can be made with common place household materials and a pair of pliers.
Instructions:
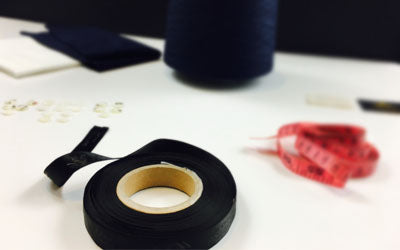
Materials
There are two possible versions of the harness:
A- uses a 3D printed nose piece, files are available on Thing verse to print either a small or large version of these nose pieces. They were designed around my wife's and my own nose so there's a good chance the fit won’t be perfect unless you can tweak your own 3D files or use a hairdryer to warm, soften and form the material after printing. If you have access to a 3D printer go ahead and print this.
B- uses a nose piece formed from a piece of stiff wire. Grab yourself a wire clothes hanger, a pliers and the printable template available here. If no clothes hanger is available be creative! The wire from the top of a Chinese takeout box is ideal, and even a hair clip could work if you take some time to straighten it out first.


To complete both versions you will also need:
1. A few rubber bands 2.80 cm (~32 inches) of string or cord.
FOLLOW ALONG WITH THIS BUILD VIDEO: https://youtu.be/9UHbpkhEs48
1. Nose Piece (Wire)
1.1 Using the template as a starting guide, snip the appropriate sized piece of stiff wire from the hanger. Note: due to the challenges of isolation the template was designed around my wife's and my own nose so be prepared to tweak the result to fit yours.


1.2 Starting from the ends, use a short nose pliers to bend the hooks that will hold the elastic. Leave a gap so that we can slide the elastic into the hook (see step 2.2) later on.
1.3 Finish the nose piece by forming the curve that will fit over the bridge of your nose. This is the trickiest part of the process, don't worry if it's not perfect.

2. Elastic
2.1 Chain enough rubber bands together to make around a 22-26 cm (9-9.8 inches) length. This part controls the fit to the face, you want that to be tight enough that it creates a good seal, but loose enough to be comfortable. You may need to jump back to this step after testing the fit.
If you're not sure how to chain rubber bands see step 4 here.


2.2 Slip both ends of the rubber band chain into the nose piece hooks and squeeze the hooks shut using the pliers.
2.3 That's step 2 finished! You can try it on and it might hook on the bridge of your nose - don't worry if it doesn't fit great at this point, it probably won't. Next we're going to add the head strap which will pull the band towards your cheekbones and create a 'seal' strong enough to tightly hold out filter fabric.

3. Head strap
3.1 Cut about 80 cm (~32 inches) of string/cord and tie a Midshipman’s hitch knots in one end. This knot allows us to create a sliding, adjustable loop that holds when under tension - useful and easy to learn!


3.2 In the same way you chained the rubber bands together, fasten the loop to the rubber bands around 2.5 cm (1 inch) from the nose piece hook.
3.3 Secure the other end to the rubber band to complete the harness using a Buntline Hitch knot.


3.4 Your harness is complete! Put the nose piece on, pull the rubber band down under your chin and lift the head strap over your head to secure on the back. With the head strap running over the top of your ears hold the knot and slide it along the cord that runs through it to tighten.
If the rubber feels too tight try relaxing the strap or adding an extra band. The Harness clamps the filter material to the face so the aim is to get the band and nose piece fitting as closely to your facial contours as you can without being too tight and uncomfortable.
4. Filter
4.1 The filter is still in development, but in the examples I've shown I have used a 23 cm x 20 cm (9 in x 8 in) corner of a 100% cotton pillowcase giving me 2 layers.
Some filter materials are better than others, and articles such as this one by the New York Times and this one address that in greater detail. I clamp it by starting with the top edge. I hold it in front of my face to find the rough center, pinch that and push it under the nose piece, then I work my way out from there. Images coming soon

Version 02


Since designing the PROCESS for anyone to make an EVERYMASK I have switched gears and am now designing the PRODUCT - a more refined version of EVERYMASK
SHARING+ IMPROVEMENT+ PROCESS
If you do create an EVERYMASK please share it on social media with hashtag #EVERYMASK so we can come together with ideas on how to improve it. You can view ROO WILLIAMS stories for a detailed process and to see how this project developed. And don’t forget to follow THE COTTON LONDON.
The Cotton Team!